RSS

It’s Rather Peculiar

Typing an entry after several months of abandoning this site does make me feel rather peculiar.  I made some cupcakes for my colleagues and I was grateful that they actually enjoyed the product. Hence, I would like to share this simple recipe. I’m sure you’ll like it.

COOKIES AND CREAM CUPCAKES

 Source : 500 Cupcakes and Muffins by Fergal Conolly

Ingredients :

For the cupcakes :

  • 225g unsalted butter
  • 225g caster sugar
  • 225 self-raising flour
  • 1 teaspoonful of baking powder
  • 4 large eggs
  • 1 teaspoonful of vanilla essence
  • 10 crushed cream-filled chocolate cookies ( I used 15 pieces of Oreo biscuits)

For the icing :

  • 375g  icing sugar
  • 225g unsalted butter, softened
  • a pinch of salt
  • 10 chopped cream filled chocolate cookies ( I cut mine into halves and place on top of the butter cream)


Method :

  1. Preheat the oven to 175 C. Place 18 foil of paper baking cases in muffin tins.
  2. Combine all the cupcake ingredients, except the cookies, in  a large bowl and beat with an electrical whisk until smooth and pale, about 2 to 3 minutes. Then stir in the cookies.
  3. Spoon the batter into the cases. Bake for 20 minutes. remove tins from the oven and cool for 5 minutes. Then, remove the cupcakes and cool on a wire rack.
  4. To make the icing, beat the icing sugar, butter and salt using an electric whisk. Spread the icing onto the cooled cupcakes and sprinkle the chopped cookis on top.
  5. Store without icing in an airtight container for up to 3 days, or freeze up to 3 months.

 
Leave a comment

Posted by on 10/09/2012 in Cakes


My Ayah and His Friends

My Ayah is known to have many friends. Since we were young, it is often to see that he brings his friends over for lunch or dinner. And Mak, being very good in the kitchen, has never failed to prepare sumptuous dishes for the (usually unannounced) guests.

Well, did I tell you that Mak used to run a small stall, serving all kinds of fried rice and noodles? Ayah, being very friendly, had told one of his friends about Mak’s stall and as fate had decided, this one particular friend is actually a ‘mi bandung’ seller. He was willing to share his mi bandung recipe. Through a phone conversation with my Mak, I managed to prepare the dish using the ingredients that Mak stated, without any exact measurements. The verdict? Mr KHz enjoyed it to the last slurp!

MI BANDUNG

Source : 

Ingredients :

(A)

  • 10 shallots (finely ground)
  • 3 pips of garlic (finely ground)
  • 15 pieces of dried chillies (seeded, blanched in boiling water, drained and finely ground)
  • 5 tablespoonful of toasted, ground peanuts (finely ground)
  • 5 pieces of Marie biscuits (finely ground)
  • 250g of beef
  • 1 beef stock cube
  • 1 L of water
  • 10-12 medium-size prawns (I leave them unpeeled)
  • 3 tablespoonfuls of chilli sauce
  • 2 tablespoonfuls of tomato sauce
  • 2 tablespoonfuls of sugar
  • salt to taste
  • 1kg of yellow noodles (blanched in hot water)
  • 4 eggs
  • 4 pieces of beancurd (deep fried and thinly sliced)
  • 2 bunches of mustard green (cut into 1 inch length, blanched anddrained)

(B) Garnishing :

  • deep fried shallot slices
  • finely chopped spring onions

Method :

  1. In a large pot, heat up oil and stir fry ground shallots, garlic and chilli paste till fragrant and the oil separates from the gravy.
  2. Then, put in beef slices and keep on stirring. Next, pour in the water and let to boil over moderate heat.
  3. Once your beef pieces have soften, put in beef stock cube, ground peanuts and Marie biscuits. Let to boil one more time.
  4. When you can see the gravy is boiling, add in tomato and chilli sauce. Add  salt and sugar to taste. Keep on stirring till gravy is thickened. Then add your prawns.
  5. As for the eggs,  pour some gravy into a non stick pan over medium heat. Crack an egg into the gravy and cook till the yolk hardens and put into the pot of gravy. Repeat with the remaining eggs.
  6. To serve, put some noodles in a serving bowl and top with sliced beancurd, blanched mustard greens and the garnishing. Spoon the gravy on top.
  7. Enjoy!
 
Leave a comment

Posted by on 04/10/2012 in Uncategorized


Mission Made Possible

It is a common fact that recipes are mainly guidelines and one is always free to adapt (and many call it improvisation) in order to cater for one’s liking. I’m always keen on adapting existing recipes and fortunately, most of the time, my adaptation produced satisfactory outcomes. However,  disasters do happen in the kitchen. What I thought as an act of rescuing turned out to be demolishing.

When it comes to baking, do adhere to the ingredients stated. There’s a valid reason why the recipe is called ‘The Red Velvet Cupcakes’. It means, the product should be red. Well, what else should I do when I realised that I’d no red food colouring when I’d already whipped up the batter? I couldn’t simply throw it away, could I? Although deep down, I knew I simply could, I just didn’t have the heart to do so. Trying to be bold (and blaming myself for not checking the larder at the first place), I poured yellow food colouring into my batter and what did I get? Instead of having it in a golden and shimmering shade, I ended up with a bowl of mustard yellow batter! Well, it’s too late to turn back so I went on and baked my cupcakes. As expected, they certainly did not look good to my eyes. Blog-hopping to the rescue and I was very happy to be able to disguise the look with something more pleasing- both to the sight and pallette too!

TRUFFLES

Red velvet truffles by citarasawan

Ingredients :

  • 200g of red velvet cake ( mine was mustard yellow)
  • 80g of cream cheese (at room temperature)
  • 1/2 tablespoonful of butter
  • 2 teaspoonfuls of icing sugar (optional)
  • 200g of cooking chocolate (melted)
  • hundreds and thousands/ colourful edible beads (I used chopped toasted almond)

Method :

  1. Mash cake pieces till crumbly and keep aside.
  2. Next, whisk cream cheese, butter and icing sugar till creamy. Add half of this mixture into your crumbled cake and mix well till a soft dough is formed. ( I used all of the cream cheese mixture)
  3. Shape into balls and arranged on a baking tin lined with wax/ baking paper. Keep in the fridge for at least 3 hours. ( I kept mine in the freezer because I was in a hurry. That’s why you can see the crack on the chocolate coating)
  4. Then, dip the balls into melted chocolate and take out using a fork and return to the baking tin lined with wax/baking paper. Sprinkle with colourful edible beads or chopped almond.
  5. Keep aside till the chocolate set.
  6. Enjoy!
 
Leave a comment

Posted by on 01/28/2012 in Cakes, Dessert


And Yet Another…….

A simple recipe which is worth a try. I was glad that I did  for MR KHz really enjoyed it!

‘MEE GORENG MAMAK’

Source : Selera Ramadhan by Rubiah Suparman

Ingredients :

  • 500g of yellow noodles
  • 200g of prawns ( I used about 10 medium-sized prawns)
  • 1 large onion (thinly sliced)
  • 3 cloves of garlic (thinly sliced)
  • 2 tablespoonfuls of tomato sauce
  • 1 tablespoonful of dark soy sauce
  • 3 eggs
  • 300g of green mustard leaves
  • 100g of bean sprouts ( I omitted)
  • 1 piece of tofu (deep fried and cut into small squares)
  • 3 green chillies (thinly sliced)
  • 1 ripe tomato (quartered)
  • 2 tablespoonfuls of chilli paste
  • cooking oil

Method :

  1. Heat up some cooking oil in a wok. Put in prawns, onion, garlic, green chillies and chilli paste. Stir fry till fragrant and the oil separates from the gravy.
  2. Next, put in noodles and eggs. Then, pour in soy sauce and tomato sauce. Mix well.
  3. Then, put in green mustard leaves, fried tofu pieces and tomato. Stir till everything is well-mixed.
  4. Serve hot.


Leave a comment

Posted by on 01/27/2012 in Noodles and Such


Oh, It’s Glorious!

It is only the 25th day of the month in this brand new year and yet, I can already feel the tiredness of  being in the working world. I know that it’s my choice to be a working mom but I bet, it’s okay to let out your feelings once in a while. Anyway, trying my very best to make full use of my time, I’ve decided to share a recipe with all of you, my dear readers.

I received two packets of spices from my friend, who hails from Terengganu. Just like me, she enjoys good food and you can always depend on her on great selection of eating and meeting places. What makes these packets special is, we’ve been friends for at least 19 years and no doubt, it is always food which binds us together.  Since it was my first time preparing the dish, I followed the recipe stated on the back of the spice packet. I was very happy that I decided to try cooking the dish. It tasted good and I will definitely cook this dish again. Aha, not to forget, Moktang, if you ever come across this entry, it is specially dedicated to you! (psstttt….don’t forget to get more spice packets for me whenever you’re in Terengganu ya!)

THE TREASURED PACKETS OF SPICES

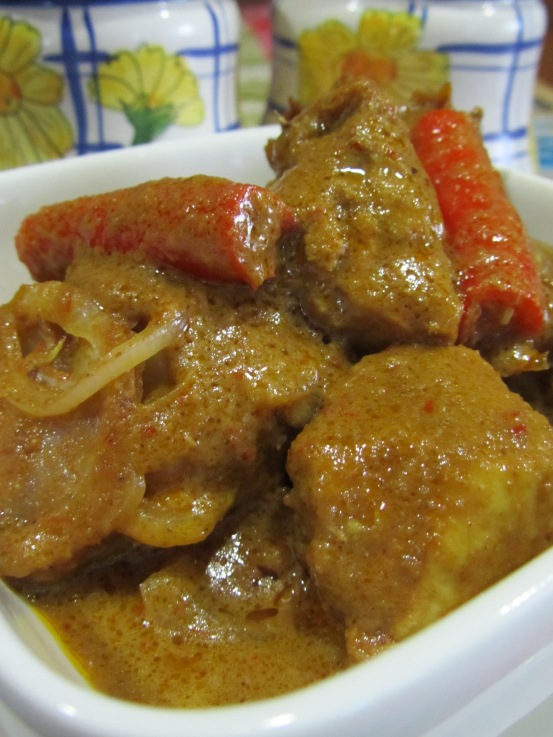
‘MASAK GULAI BUNGA ROSE’

Ingredients :

1 kg of chicken (cut into small pieces)

  • 10 shallots
  • 3 cloves of garlic
  • 1 inch piece of ginger
  • 1/2 inch piece of galangal
  • 1/2 inch piece of turmeric root
  • 8g of Rempah Masak Cap Bunga Rose ( I used 2 teaspoonfuls) 
  • chilli paste ( I used 2 tablespoonfuls)
  • tamarind ( I used 1/2 tablespoonful of Adabi tamarind paste)
  • sugar and salt to taste
  • coconut milk ( I used a packet of Ayam’s brand coconut cream, about 200ml, diluted with similar amount of water)
  • cooking oil ( I used about 5 tablespoonfuls)
  • 1 large onion (sliced into rings)

Method :

  1. Firstly, grind shallots, garlic, ginger, galangal and turmeric root finely and add in chilli paste and rempah masak.
  2. Pour ground ingredients into a big bowl and put in your chicken pieces. Mix well and let to marinate for 15 minutes.
  3. Next, heat some cooking oil and put in the marinated chicken pieces.
  4. Stir occasionally and once the chicken is half-cooked, pour in the coconut milk.
  5. Lower the heat and let to simmer till your chicken pieces are tender.
  6. Add in tamarind paste, salt and sugar to taste. Scatter the onion rings, stir for another 5 minutes and turn the heat off.
  7. Serve hot with plain, boiled rice.
  8. Isn’t friendship a glorious thing ?
 

Going By The Weather

On Saturday morning, I was greeted by rather bleak sky and the sun seemed lazy to shine. I’m not really sure about others but the weather does influence me in deciding what to prepare for members of the clan. We have been having fried rice vermicelli quite often so I was thinking of something comforting yet satisfying during the gloom weather. Since it was a rather cold and cloudy morning, I decided to try this recipe which had been in the folder for months. The verdict? I was so glad with the outcome of my experiment. Mr KHz enjoyed it to the last spoonful!

As the first step towards such blissful and comforting feeling, first, spoon the piping hot broth  onto a bowl of soft rice.

Next, sprinkle all the toppings on top and enjoy the wonderful burst of tastes and texture!

NASI AIR SIAM (Thai-Style Soft Rice in Beef Broth)

Source : sitiazma@MyResipi.com

Ingredients :

(A)

  • 3 cups of rice (add more water than usual so your rice would be soft and slightly mushy but not watery)
  • 1/2 kilogramme of beef
  • 5 inch piece of ginger (finely pounded)
  • bird’s eye chillies ( I used 15 pieces)
  • 3 to 4 tablespoonfuls of vinegar
  • salt and sugar to taste 
  • cooking oil

(B) For the toppings

  • dried anchovies ( I used 1/2 a cup)
  • fried shallots (I omitted this and replaced with thinly sliced omellette made from 2 eggs)
  • rice vermicelli (rinsed and drained and deep fried till crispy) (I omitted this)
  • Chinese parsley (finely chopped) (I replaced it with spring onions)
  • limes of calamansi limes (I used 1 lime and cut into wedges)
  • chilli water

Method :

  1. As your rice is cooking, cut beef into large chunks and put into a large pot. Put enough water so your beef pieces are submerged and boil till cooked. Once cooked, take out beef pieces and keep aside. Heat up the broth and add sugar and salt to taste.
  2. Meanwhile, shred the beef pieces finely and mix with pounded ginger. Deep fry till crispy, drained and keep aside. *A tip from the recipe owner: if you decide to use all the toppings, you you fry the rice vermicelli first, followed by the anchovies and finally the shredded beef. This is to make sure that the oil is clean and will not ‘tarnish’ your rice vermicelli and anchovies.
  3. As for the chilli water, pound chillies finely with  salt and sugar (I used 1 teaspoonful of salt and 3 teaspoonfuls of sugar). Then, add in vinegar and mix well.
  4. Now that everything is done, scoop some rice into a bowl and pour the broth. Add the toppings and mix well.
  5. Enjoy!
 

Going Home

My break started earlier than Daus’s so my plan to bring him and Atus to spend some time in my hometown had to be put on hold till he finished his school session. Besides, Mr KHz’s cousin tied the knot at the beginning of the school holidays so the first two weeks were allocated for the ceremonies.  Finally, the much awaited time arrived. My younger sister, (Cik Ein to both of my kids) suggested that we departed on Friday afternoon and returned on Monday evening so the kids would have longer time to spend with Atuk and Nenek, and not to forget, Nakal, Cheetah, Bulat, Beyang, and the rest of the cat clan. Ah! You should see the joy on their faces when they saw Nyau (Cik Ein‘s humongous tom-cat) had tagged along this much awaited trip. Alhamdulillah, the journey was smooth-sailing, with both kids and cat enjoying the ride.

Going back to one’s hometown would not be complete without sampling delicious food, courtesy of Mommy dearest and being involved in lip-smacking adventure of tasting sumptuous dishes from well-remembered eating places, as well as making sure that food supply is enough throughout the stay. This would sound a cliche, but I find food does taste better when I am surrounded by my loved ones. Talking about being loved and cared for, this is what I got for having a loving brother (and he’s Pa Teh to Atus and Daus) who simply knows that nothing cheers his elder sister better than his specially prepared mouth-watering goodness.  A crispy snack, yummy to the last bite. Simply delicious!

DEEP FRIED PRAWNS

Since I did not watch him preparing the dish, I cannot really share the recipe here. I did call him and ask, and as expected, the usual reply was, “I didn’t really measure the ingredients. As long as the batter is thin, like the consistency of the batter used to make banana fritters, then it’s going to be okay.” Well, you don’t ask for measurements in grammes and litres from a mechanic, do you?

 
1 Comment

Posted by on 12/22/2011 in Seafood, Snacks


Breaking The Spell

Having a long break does bring both positive and negative impacts. Looking at the positive side, I do feel calm as I do not have to follow the routines as when school was in session. Unfortunately, this long break has brought its fair share of negativity. Somehow, I have lost track of the days and dates. Everyday seems to be the same and I feel as if time crawls and very soon, I am affected. As a result, most of the time, you would find me rather glued to the monitor, staring at the square box or bury my face into novels after novels.

After all, I am not to be fully blamed. My kids have ‘helped’ in lowering my productivity level. Since they do not fancy rice, this means, no elaborate dishes needed to be prepared. Simple fried noodles or a roast chicken would be finger-licking good to both of them. For a change, I would just prepare chicken soup and boil some rice vermicelli and voila! A dish is created and as long as they eat and they are happy, I am one satisfied mom.  Hence, accumulating my laziness to try new recipes so lesser hours were spent in the kitchen. As a result, this blog has been left abandoned for nearly a month.

Glancing at the calendar this morning had more or less awakened me from my long hibernation mode. There would be less than 2 weeks before I have to go to school again. In fact, I have to be in school for duty on this coming Friday. Well, I got some help from my breadmaker to prepare something for the kids to much for dinner.  take it as a start for me to crawl back into the real world. One step at a time, ay?

PIZZA WITH CHICKEN CUBES, MUSHROOMS AND COCKTAIL SAUSAGES

Ingredients :

(A) For the crust

  • 140ml water
  • 1 tablespoonful of olive oil
  • 225g of bread flour
  • 1 teaspoonful of salt
  • 1/2 teaspoonful of sugar
  • 1/2 teaspoonful of instant dry yeast

Method :

  1. I used my breadmaker to knead and proof and it took me 1 hour and 10 minutes.
  2. Once risen, take out the dough and sprinkle some flour onto the rolling mat and roll the dough into a circle of 1cm thickness and carefully transfer onto your pizza pan. This recipe fits a 30cm diameter round pizza pan nicely.
  3. Put tomato sauce onto the dough evenly and sprinkle with cheese.
  4. Arrange toppings of your choice and top with more cheese.
  5. Bake in a preheated oven at 175C for 15-20 minutes or till the crust is brown and crispy.
  •  If you do not have a bread maker, mix sugar,yeast and flour into a large bowl. Mix salt with water and add to the dry ingredients and mix well. Add in olive well and knead till your dough is elastic and dos not stick to your hand. Let to rise for about 45 minutes and follow the procedure listed above.

(B) For the sauce:

  • 1 can of peeled tomatoes (finely chopped)
  • 100ml of water
  • 2 tablespoonfuls of brown sugar
  • 1/2 tablespoonful of tomato puree
  • 1 yellow onion (finely chopped)
  • 1 teaspoonful of dried oregano
  • 2 tablespoonful of olive oil
  • salt to taste

Method :

  1. In a pot, heat olive oil and stir fry chopped onion till translucent but do not brown the onion.
  2. Add in the remaining ingredients and mix well.
  3. Lower the heat and stir occasionally till the sauce thickens. Let to cool.
  • This sauce can cater for 2 pieces of pizza. Use as you wish and keep the remaining sauce frozen in an airtight container.
(C) For the toppings:
  • 8 pieces of canned button mushrooms (sliced)
  • 5 pieces of beef cocktail sausages (sliced lengthwise)
  • 150g of diced, cooked chicken breast
  • 150g of  grated mozarella
  • 50g of grated parmesan
 

Cheesy and Gooey, and Loving It!

I have been meaning to try this recipe for quite some time but as usual, the typical reason would be time is not always on my side. However, I finally had the chance to do it. The verdict? It’s cheesy and gooey and I’m loving it!

CHEESY WEDGES

Source : MamaFaMi

Ingredients :

  • 500g frozen wedges ( I used Simplot Spicy)
  • 5 sliced cheese (orange in color)
  • 1 tablespoonful of butter
  • 1 tablespoonful of  flour
  • 1/2 cup of fresh milk
  • 2 tablespoons of plain yogurt ( I used Nestle low-fat)
  • Mayonnaise
  • 1 teaspoonful of chicken powder (I added)
  • 1/2 teaspoonful of chilli powder (I added)

Method :

  1. Fry the wedges till crispy and keep aside.
  2. Melt butter in a non stick pan over slow fire. next, add in flour and keep stirring.
  3. Pour fresh milk into the pan and stir till the mixture thickens.
  4. Add in your cheese slices and stir till the cheese melts.
  5. Add in yogurt and stir well.
  6. Place the sauce and mayonnaise in 2 piping bags ( I just used plastic bags) and pipe onto the wedges.
  7. Serve hot.

 
Leave a comment

Posted by on 11/20/2011 in Snacks


Fruity Goodness

This recipe is simple and yet very satisfying. Do give it a try, will you?

FRUIT PASTRY


Source : Gert of My Kitchen Snippets and MamaFami

Ingredients :
  •  113g butter at room temperature
  • 1 cup of caster sugar ( I used vanilla sugar)
  • 50g sour cream (I replaced it with plain low-fat yoghurt)
  • 1 teaspoon of vanilla essence
  • a pinch of salt
  • 1 teaspoon orange zest
  • 3 Grade A eggs, at room temperature
  • 210g plain flour
  • 1 teaspoonful of baking powder
  • 500g fresh fruits (I used strawberries, blueberries and canned peaches)
Method :
  1. Place cuts fruits in a strainer and sprinkle with 2 tablespoonfuls of sugar
  2.  Pre-heat oven to 350 degree F ( I set mine at 150C). Line and grease a baking pan.
  3. Cream butter, sugar and yoghurt together until creamy.
  4. Add eggs one at a time and beat well. Add vanilla and orange zest. Continue beating.
  5. Fold in flour and baking powder gently until everything is well-mixed
  6. Pour batter into the baking pan and smooth the top. Place cut fruits on top.
  7. Bake for 50-60 minutes or until cake is done.
  8. Let to cool and serve.
 
Leave a comment

Posted by on 11/19/2011 in Cakes